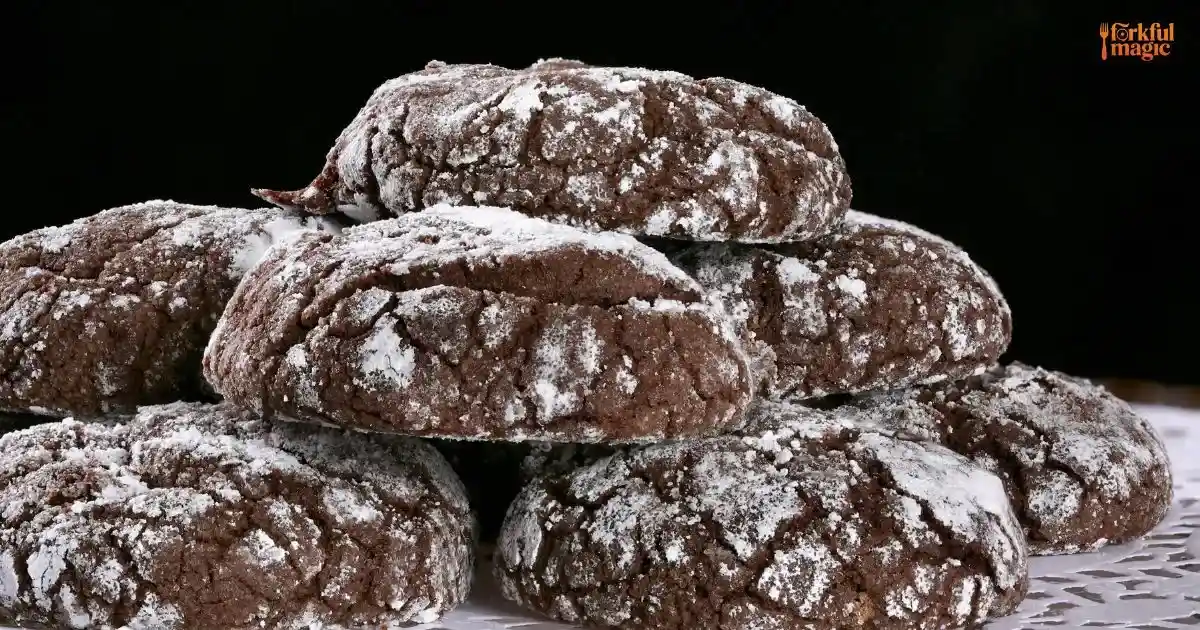
Ah, Valentine’s Day! A time for love, romance, and sweet treats. I remember the first time I baked crinkle cookies for my partner. The kitchen was filled with the sweet aroma of chocolate and sugar, and the anticipation was almost too much to bear. These cookies didn’t just taste good; they were a delightful expression of affection. Valentine Crinkle Cookies are unique because they’re not just visually stunning with their cracked, snowy tops but also packed with flavor. Perfect for sharing, they are a timeless classic that every home baker should master.
Ingredients & Substitutions
Let’s dive into the components of these delightful cookies. Here’s what you’ll need:
- All-purpose flour: 2 cups
- Cocoa powder: ½ cup (unsweetened)
- Baking powder: 2 tsp
- Salt: ½ tsp
- Sugar: 1 cup (granulated)
- Brown sugar: ½ cup (packed)
- Butter: ½ cup (unsalted, melted)
- Eggs: 2 large
- Vanilla extract: 1 tsp
- Powdered sugar: for rolling
Substitutions:
- Flour: For gluten-free cookies, use a 1:1 gluten-free flour blend.
- Cocoa powder: Dark chocolate cocoa powder can enhance flavor.
- Butter: Coconut oil is a great dairy-free option.
- Eggs: To make it vegan, replace each egg with ¼ cup of unsweetened applesauce or a flax egg (1 tbsp ground flaxseed mixed with 2.5 tbsp water).
Choosing high-quality ingredients is crucial. Fresh, organic eggs can elevate the cookie’s richness. And always go for unsweetened cocoa—your sweetness balance will thank you later.
Step-by-Step Instructions

Now, onto the fun part: making these cookies!
- Preheat the Oven: Start by preheating your oven to 350°F (175°C). This step is key; a properly heated oven ensures even baking.
- Mix Dry Ingredients: In a bowl, whisk together flour, cocoa powder, baking powder, and salt. This helps distribute leavening agents evenly—no one likes a flat cookie.
- Cream Sugars and Butter: In another bowl, combine granulated sugar, brown sugar, and melted butter. Mix until smooth. The melted butter gives a fudgy texture, which is a game-changer.
- Add Eggs and Vanilla: Beat in the eggs one at a time, then stir in the vanilla. Make sure it’s well-mixed; this helps create a rich, velvety dough.
- Combine Mixtures: Gradually add the dry ingredients to the wet mixture. Don’t overmix; just combine until everything’s moistened. Overworking can lead to tough cookies.
- Chill the Dough: This is an essential step! Chill the dough for at least 30 minutes. It helps solidify the fats, resulting in a thicker cookie that spreads less.
- Shape and Roll: Scoop out a tablespoon of dough, roll it into a ball, and then roll it in powdered sugar. The sugar coating creates that crinkly effect while baking.
- Bake: Place the rolled dough on a lined baking sheet, leaving space between each ball. Bake for about 10-12 minutes. They should look set but still soft in the center.
- Cool: Let them cool on the baking sheet for a few minutes before transferring to a wire rack. This helps the cookies maintain their shape.
Common mistakes? Forgetting to chill the dough is a biggie. And rolling too tightly can lead to less crinkle. Keep it loose!
Cooking Techniques & Science
Understanding the “why” behind each step can elevate your baking. Chilling the dough isn’t just to make it easier to handle. It also allows the flour to fully hydrate, enhancing the cookie’s texture. The sugar coating caramelizes slightly during baking, creating a beautiful contrast of textures—chewy inside, crisp edge.
Using melted butter instead of softened butter alters the cookie’s texture. Melted butter leads to a denser, fudgier cookie, while softened butter yields a lighter one. It’s science, folks!
Serving & Pairing Suggestions
Presentation is key, especially for Valentine’s Day! Arrange the cookies on a heart-shaped platter, dust with extra powdered sugar, and pair with fresh strawberries for a romantic touch.
For drinks, consider a glass of cold milk or a rich hot chocolate. If you’re feeling adventurous, a spiced chai tea can elevate the experience.
Want to impress? Serve these cookies alongside a scoop of vanilla ice cream. The warm, fudgy cookie contrasts beautifully with the cold, creamy ice cream.
Conclusion
In summary, Valentine Crinkle Cookies are more than just a treat; they’re a heartfelt gesture. The combination of flavors, textures, and the joy of sharing them adds to their charm. Remember to chill your dough, mix gently, and embrace the art of baking.
For those looking to experiment, you can add chocolate chips, nuts, or even a hint of peppermint extract for a twist.
FAQs
1. Can I make these cookies ahead of time?
Absolutely! You can refrigerate the dough for up to 3 days before baking. Just let it sit at room temperature for a few minutes before rolling.
2. Why did my cookies not crinkle?
If they didn’t crinkle, the dough might’ve been too warm or you didn’t roll them in enough powdered sugar.
3. How can I store leftover cookies?
Store them in an airtight container at room temperature for up to a week. They also freeze well for up to three months.
4. Can I use different flavors of cocoa?
Yes! Try using dark chocolate or even flavored cocoa powders for a unique taste.
5. What should I do if my dough is too sticky?
If your dough is too sticky, chill it for a bit longer or add a tablespoon of flour at a time until it’s manageable.
So there you have it—Valentine Crinkle Cookies that are sure to impress! Happy baking!